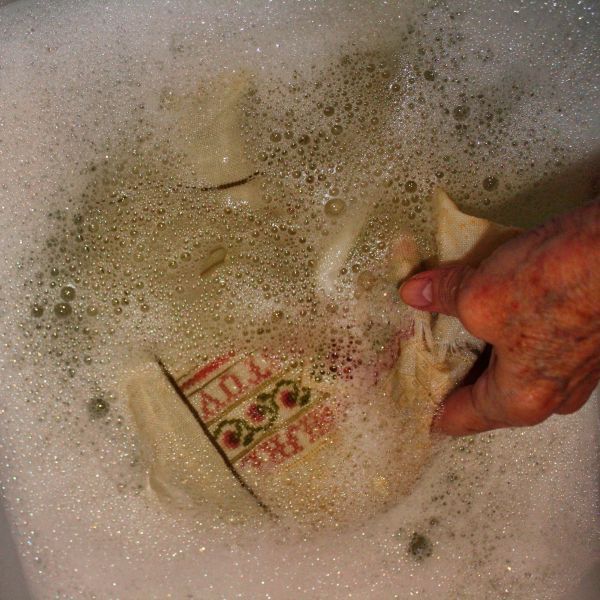
 Why Should I wash cross stitch? Well! If you’re anything like me you’ll tend to end up with a few marks on your newly completed project. Plus, while you were stitching, natural oils from your hands were being transferred to your material and threads; dust was settling on it as well. These need removing before they turn to stains. Any fabric that isn’t clean is also subject to discoloration within a few years. Thankfully, you can remove all but the most stubborn of marks and stains by carefully washing your cross stitch piece.
We’ll show you in this article what to do and what to avoid when cleaning your recently completed cross stitch picture…
[emember_protected for=”2-3-4-5-6-7-8-9-10-11-12-13-14″]
Preparing your cross stitch piece for washing
https://youtu.be/g6IaOMLjRzg?t=8
You really should launder every completed project before framing or finishing it regardless of the care taken during stitching. This is an essential step that you’ll always regret omitting if you don’t carry it out. You have created a thing of beauty with nothing more than a small piece of fabric, some floss, and a needle. So, why on earth would you take a chance on spoiling it just to save a little time?
First, let’s cover some basic care instructions that will reduce the possibility of staining.
- Wash your hands frequently and avoid using lotions or perfumes.
- Remove your cross-stitching project from the hoop when not stitching.
- Store your project in a bag or sewing basket between stitching sessions.
- Avoid eating, drinking, or smoking while working on your project.
By carrying out the above, you’ll be avoiding most of the problems other stitchers struggle to avoid.
Be aware that some types of needlework threads and colored fabrics might not be colorfast. Especially where you’re using hand-dyed floss or fabric, you should check to make sure the materials are colorfast before washing.
The equipment and supplies you’ll need for washing your cross stitch include:
- A large plastic bowl or basin
- A mild soap such as Dri-Pak Soap Flakes, Ivory Soap Flakes, or a mild dishwasher soap
- A couple of fluffy light cotton bath towels
- A clothes iron and ironing board
- A pressing or ironing cloth.
Note: Each cross-stitch piece should be washed separately by hand. NEVER wash cross-stitched pieces with other laundry or with other completed projects.
Washing instructions:
Carry out the following steps for washing your cross stitch piece:

- If using soap flakes, dissolve a few of the flakes in hot water and allow the soapy solution to cool before use.
- Pre-rinse your cross stitch under cool running water to dampen it.
- Fill a bowl or basin with warm water to which you have added a few drops of a mild dishwashing liquid or the soap flakes solution you prepared above.
- Prepare your cross stitch for washing by carefully placing it into the soapy water and allow it to soak for at least 15 minutes.
- Swish it gently by hand and allow it to soak for a further few minutes if you can still see marks or stains. Any stain that requires extra effort may be brushed with a soft toothbrush. DO NOT scrub.
- Remove the cross stitch from the soapy water and squeeze it gently before placing it in cold water. Do not wring or pull at your project.
- Rinse cross stitch in cool water two or three times making sure the final rinse water is free of suds and perfectly clear.
- Place the wet fabric between two clean light towels or between the folds of one large one. NEVER allow the piece to touch upon itself or leave damp cross-stitch folded.
- Gently roll the towel(s) and squeeze to absorb most of the water. NEVER wring your completed project.
- With most of the water removed you are ready to place the piece face down on a fresh light towel for gentle pressing.
- If there are fold lines or creases in your cross stitch, check to make sure they are thoroughly clean. Avoid the application of heat because it will set most stains, making them permanent.
- Place the damp piece face down on a clean towel. Iron on the back side until totally dry using a pressing motion. Be careful to use an up-and-down motion rather than side-to-side to avoid distortion of the stitches. You will find that a medium setting on your iron will remove wrinkles from most fabrics except linen, which may require a slightly higher setting.
- If your design contains any synthetic or metallic fibres you will need to protect the back with a pressing cloth; a piece of cotton, such as muslin, works well.
- To remove creases it may be necessary to use the steam setting on your iron. Some fabrics such as linen may require using the high temperature. Be sure to use a pressing cloth, otherwise your piece can be damaged by the steam and heat.
- Any crease that doesn’t respond to ironing may be removed by blocking (add x-ref details of blocking article).
What to avoid
CAUTION: Avoid the use of harsh detergents containing phosphates that may not be totally water soluble. Laundry products designed for hand washing garments are not recommended for washing cross stitch. Many of them may not be biodegradable making them inappropriate for an heirloom you wish to preserve.
CAUTION: Chlorine bleach diluted with water seems to have little effect on DMC™ floss but will definitely remove the color from Aida. Obvious stains should be treated with white vinegar or lemon juice prior to washing.
CAUTION:We don’t recommend you use Scotchgard™ and products of this type for use on cross-stitch because the ingredients may cause a chemical reaction with the dyes in the floss.
It is preferable to frame your completed project under glass to prevent soiling. When using another finishing technique simply be sure to use only washable materials; then if the piece becomes soiled it can easily be cleaned using the same washing process.
Although most Aida and evenweave fabrics are made of cotton or linen, new fabrics are continually appearing on the market. If you’ve stitched one of your projects on silk or wool, then it will need dry cleaning. Be sure to advise your local dry cleaner to exercise care with any dry cleaning chemicals. Those containing benzene and other chemicals may react with the dyes in the floss resulting in major damage to your needlework.
Take care with your washing and you’ll emerge with a beautiful, clean, pristine cross stitch piece.
Hey! With your own hands you have stitched a priceless heirloom. Care for it properly now and ensure its longevity and enjoyment for future generations.
Did you find this article helpful? Do you have an alternative method for washing your cross stitch that works for you. I’d love to hear what experiences you’ve had when cleaning your own cross stitch. I answer all emails received, so if you’ve any stories, comments, or questions – please feel free to send them this way.
Click here to check out the latest suitable dishwasher soap products on Amazon
’til next time – believe in yourself.
John ?
[/emember_protected]
